Marquee Light Replacement
Happy New Year everybody!
When I got my Astro City back in May of 2011, it was in great shape but it had one issue: the fluorescent lamp for the marquee didn’t work. Before I headed back to work I wanted to finally get this fixed, so I spent New Years Day working on it.
The original fixture required a starter bulb, which was missing when I got the cabinet. The first thing I tried was ordering some FG-1E starter bulbs and screwing one into the empty socket. This somewhat fixed the problem in that I could get the lamp to start up, but it didn’t work without manual intervention since something was wrong with the ballast. I asked around on forums but with no easy fix, I didn’t worry about it too much since I was too busy playing games. Finally, I decided to just replace the whole fixture. I’ve seen others talk about doing this but haven’t found a comprehensive guide of how to do it, so I figured I’d document what I did to replace mine.
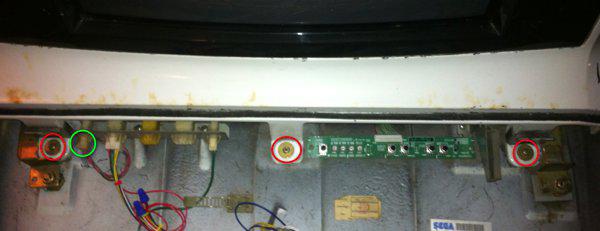
First thing I did was remove the monitor shroud. Remove the metal panel on the back of the cabinet that covers the speakers and lamp, then underneath the control panel unhook the speaker AMP-UP connector (in green) and three screws (in red) as shown below.
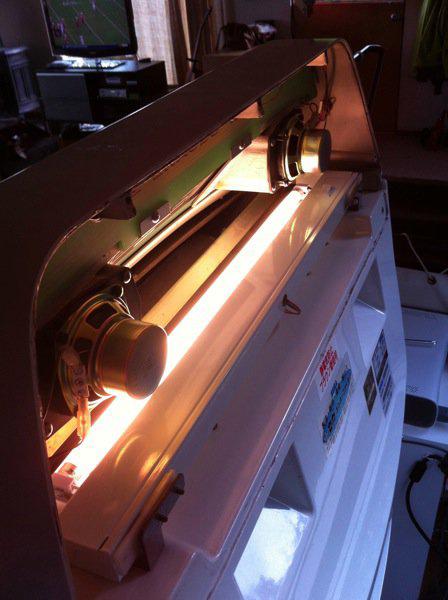
With the shroud removed, we now have easy access to the fluorescent fixture and can remove it.
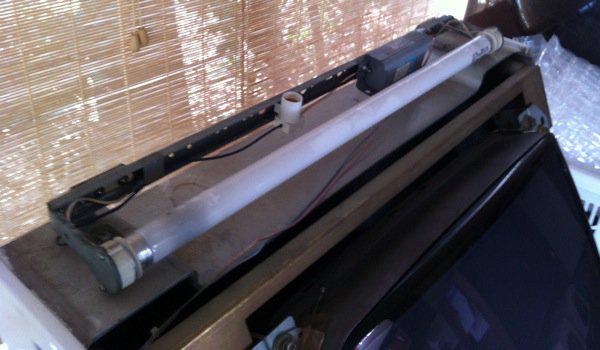
You can see there are two wires running out of the fixture, one pink and one gray. Follow these down to a connector inside the cabinet that should be reachable through the service door (where you put PCBs) if you lay on your back and look up inside the cab. Once you unhook that connector, you can unscrew the four screws for the fixture and set it aside. With the fixture removed, now would be a good opportunity to do some cleaning around the mounting brackets.
Now we’re ready to wire up the new fixture. I bought a 24-inch direct wire fixture off Amazon, however here in the US things are 120V while the power coming off the power supply inside the cab is 100V since this is a Japanese cabinet. I plug my cabinet into step-down converter to convert 120V to 100V, so before I went through all the trouble of wiring up the light only to find it not work, I figured I would see what happens with the fixture I bought when it’s fed 100V.
Now, a bit of a disclaimer: I’m not an electrician and I don’t really know what I’m doing. I’m not sure if anything I’m doing here is a terrible idea and/or risky. I talked to some folks who know a little about wiring and voltages and they made it sound like nothing to worry about, so I trusted them. However, I maybe shouldn’t have and should have consulted a professional. If you do know what you’re doing and are finding what I’m saying to be stupid and dangerous, please let me know!
The direct wire fixture has three wires: white (neutral), black (hot), and green (ground). I cut a three prong cord off of a cheap power strip and wired up the three wires so that I can plug the fixture into my step-down converter and make sure that it will work on 100V. First I tested it on a wall socket to check my wiring and it worked fine, then I plugged it into the step-down converter and it worked fine! Whew!
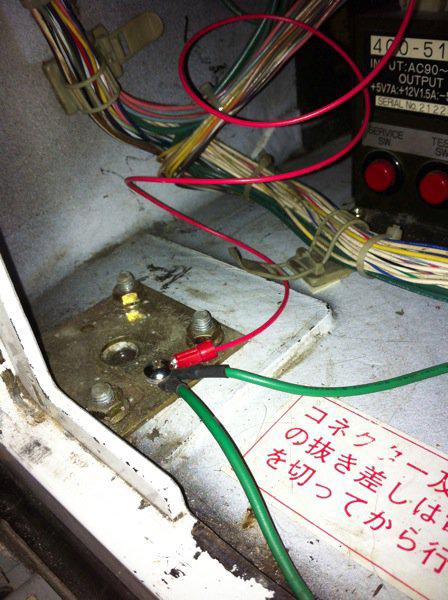
Now we’re ready to wire the new fixture into where the old one connected to the power supply. I cut the pink and gray wires off the old fixture so that I could reuse the connector and wire. From the fixture, wire the pink wire to the black wire and the gray wire to the white wire. What about ground? The old fixture has no ground wire, but the new one does. Thankfully there are quite a few ground points within the cab, so you can just wire it to one of those. I crimped a ring terminal connector to the ground wire and hooked it to a post just inside the service door by the front left leg. The ground wire for the light is the red one:
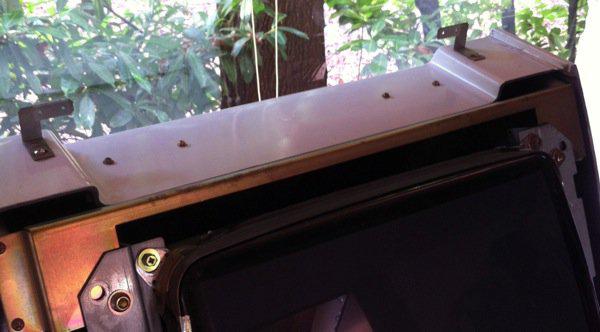
Next, the new fixture didn’t have any mounting holes, so I need to drill some. I just held it up to the bracket and marked where the holes needed to go, then used a punch on those spots to help guide the bit. With those drilled, the new fixture can now be mounted and things can be reassembled. Viola!
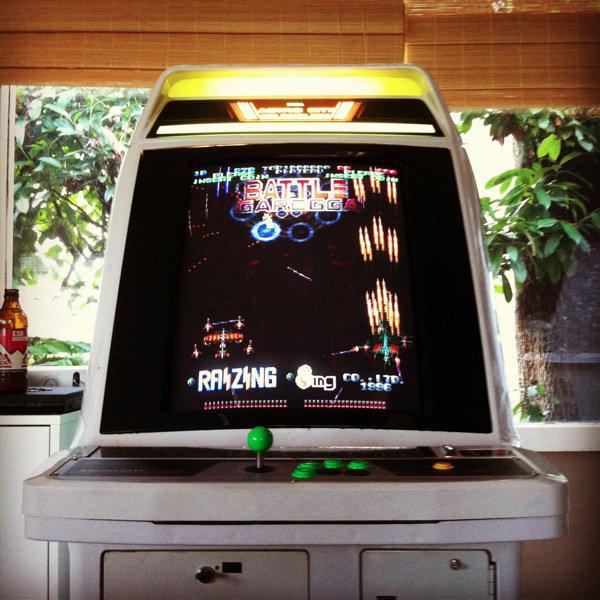
I can’t believe I went for so long without a working light! The cab now really ties the room together.