Sega Naomi Netboot
I bought a Sega Naomi with NetDIMM off a guy on the shmups forum and got it up and running. I ran into some troubles, but with a little work I was able to start NetBooting games.
The Naomi is the arcade version of the Dreamcast, which is why so many of the games that were released on Naomi in the arcades were ported to Dreamcast. I bought a Dreamcast in 1999 when they were new and I still have it. It’s one of my favorite gaming systems and many of my favorite games on it started as Naomi arcade releases, which is what interested me in getting a Naomi. They are common and pretty cheap, a motherboard will cost about $80.
The Naomi used a few different media formats for games. Some games were simple cartridges and some required an add-on GD-ROM drive, the same disc format used by the Dreamcast. Since arcades don’t want to have players staring at loading screens, the GD-ROM drive was only used during boot up in conjunction with a DIMM cartridge so that the whole game could be loaded into and played from RAM with zero loading times.
This means that you can use other methods to load the game into RAM. GD-ROM drives tended to fail because of their mechanical nature, so later Sega released a Compact Flash module as well as a NetDIMM. The NetDIMM is basically some RAM with a network interface and arcades could network their machines and load games onto them from a centralized location. This required protection keys and security chips to prevent people from just pirating games.
Of course, people have cracked that protection and now you can download games off the internet and boot them using a computer networked with the Naomi. I didn’t want to have my computer sitting around and hooked up to play games, but thankfully you can now use a Raspberry Pi with an Adafruit LCD display to build a self-contained unit to send the games! This is what pushed me over the edge and made me finally want to get a Naomi.
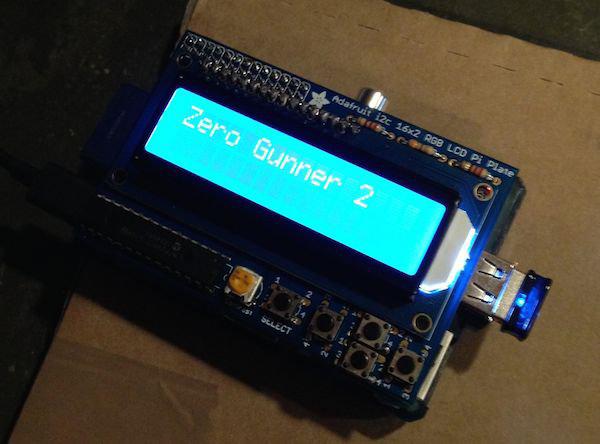
You use the buttons to select which game, then hit select to send it to the Naomi. The project for driving the LCD and menus is called piforcetools. It uses triforcetools to send the game data to the NetDIMM.
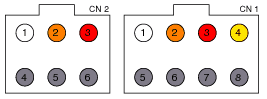
I had a Capcom I/O board that I got with my Taito Type X that I bought from KevinDDR, so I would use that to convert the Naomi’s JVS I/O to JAMMA. The Naomi I bought didn’t come with any power cables or anything, but I was able to track down the connector type and build a cable that would allow the Capcom I/O to power the Naomi. Here is the plug housing and here are the pins that you need to build a power connector. The pinout is straightforward and is available here.
I got the system in the mail, hooked it all up on my test bench, and switched it on AND….. nothing. Black screen. The Naomi’s fans came on so it was getting power, but no other signs of life. Bummer. First thing I did was remove the NetDIMM cartridge and power it up again. It booted! Ok, that’s good since it means the main board isn’t fried. I checked the voltages with a multimeter and the 3.3V, 5V, and 12V lines were all fine. Plugged the NetDIMM back in, powered up, AND… nothing again. Well, time for Googling.
I found a forum thread saying that the Capcom I/O cannot provide enough power to drive a NetDIMM and that you needed a separate power supply. That’s a bit of a bummer since getting the power off the I/O would cut down on cable mess, but it was worth a try so I ordered a cheap ATX computer power supply from Amazon. Once that arrived, I hacked up the 20-pin ATX motherboard connector to get 3.3V, 5V, 12V and ground lines into a Naomi power connector. I switched on the power supply but it didn’t seem to turn on since its fan wasn’t spinning. I stared at it for a little bit but then I remembered that modern computers have a soft power switch, and that is flipped by grounding pin 14. So I snipped that green wire and the black one next to it, which is a ground, and used a wire nut to tie them together. I flipped the switch on the power supply and it fired right up, then I used my multimeter to double check the lines I wired up to go to the Naomi as it’s always good to check that before plugging it in and frying something.

Now for the moment of truth, will the ATX power supply drive the NetDIMM? YEP! I went into the service menu to set the IP address of the NetDIMM and checked that the Raspberry Pi could ping the NetDIMM IP address, then I tried to send it a game and it worked!
Rant: why do some service menus make you navigate them using only the TEST and SERVICE buttons!? You have a joystick right there! My test bench doesn’t have buttons wired up for those, which I need to fix, so I had to find the wires in the harness and touch them to a ground wire to navigate the menus. Talk about hacky. But when you get to the menu item where you enter the IP address, you can use the joystick for that so it’s not like it can’t read those inputs!
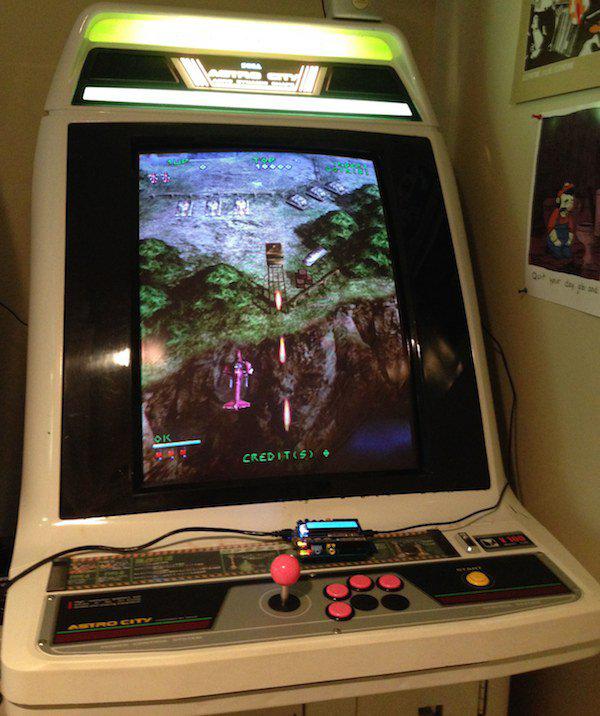
The next thing I need to do is mount all this to a wood board so that I can tame the mess of wires and boxes in my cab. It all barely fits in the Astro City PCB bay and I want to easily be able to move it between my vertical and horizontal cabs. I’ll need to figure out a way to do that.
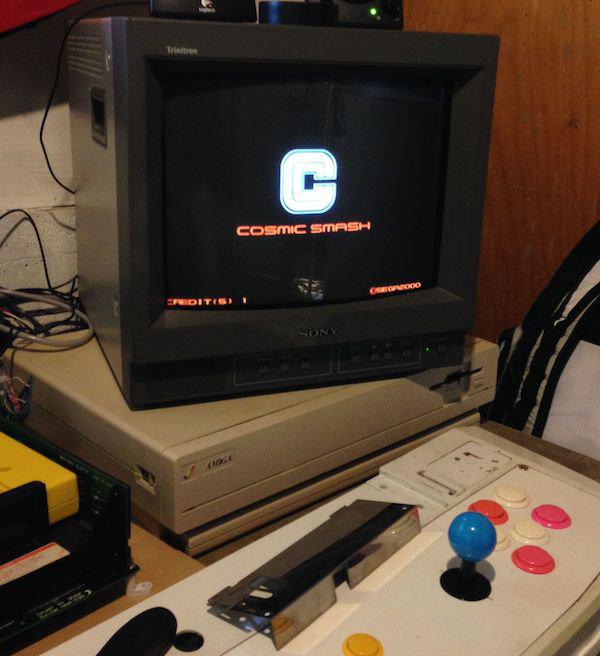
Time to play some Under Defeat! Or maybe some Cosmic Smash! Or Zero Gunner 2! Or… TOO MANY GOOD GAMES!